SAML AWS SSO
AWS SSO (SAML)
AWS provides comprehensive documentation on how to set up a SAML 2.0 Application. In order to set this up you will need to have two values to populate your custom application with. These are the Service Provider Entity ID and Service Provider ACS URL. For more information on setting a descriptive Service Provider Entity ID click here.
The Service Provider ACS URL must be set to https://<COMET_BASE_DOMAIN>/aws-sso/acs/aws_saml/aws_saml.
- Custom Login URL:
https://comet.example.com/aws-sso/login/aws_saml/aws_saml - Custom ACS URL:
https://comet.example.com/aws-sso/acs/aws_saml/aws_saml
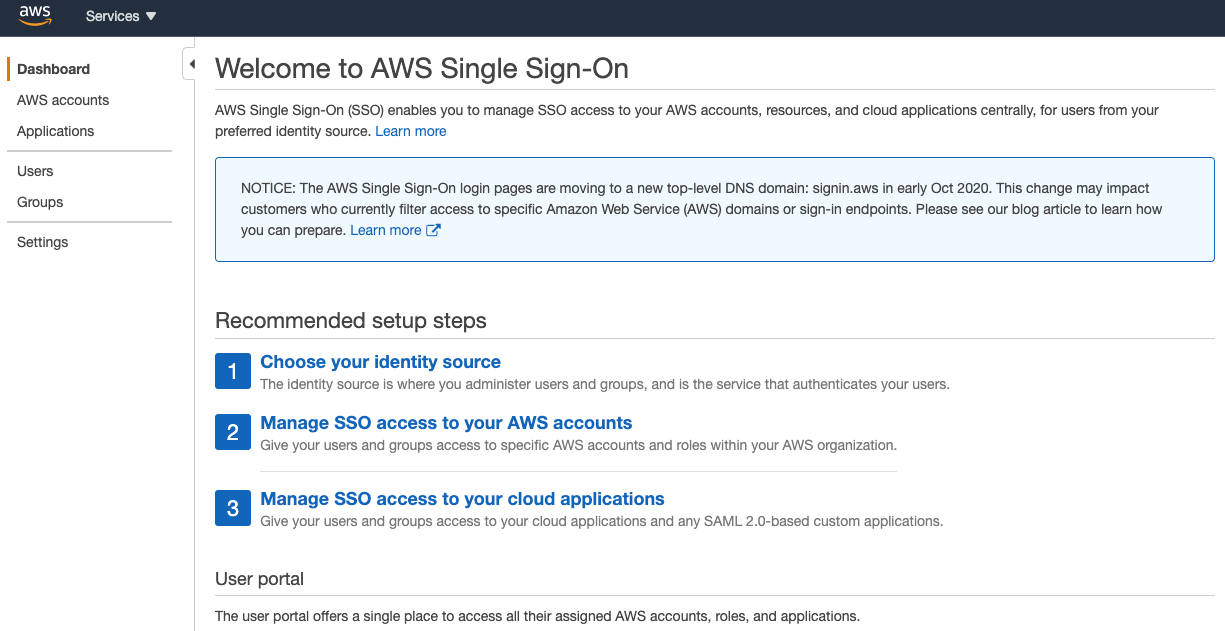
From the AWS Console, Navigate to the SSO Dashboard, this is an introduction and overview page which provides options for single sign on management.
The SSO Application section is where you create a new custom application. The application section is also for managing existing SSO applications. Since we do not have an out of the box SSO application for Comet, select Add a new application.
Give your SAML application a descriptive name...
And move on to the properties section. This section will use the Service provider Entity ID and ACS URL from the previous section.
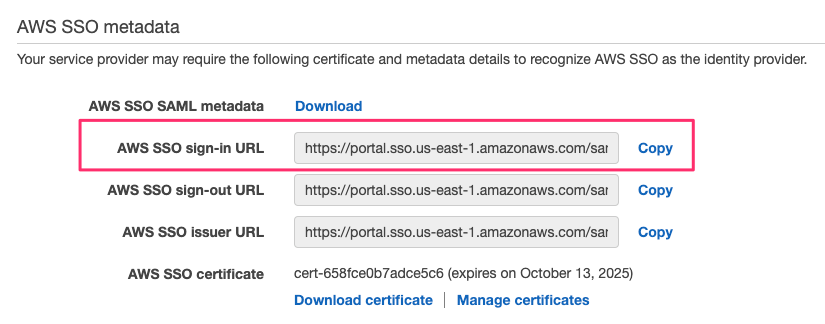
The Metadata section contains URLs that you will need to set later. Please note the AWS SSO SAML metadata file URL and the AWS SSO sign-in URL as we will be setting these later on when running cometctl aio update-config.
You will need to enter the application data manually as no SAML Metadata file is provided.
After clicking the highlighted URL, field for the application ACS URL and the application SAML audience URL will be provided.
Fill in the ACS URL $comet_base_domain/aws-sso/acs/aws_saml/aws_saml and set application SAML audience URL to https://region-code.signin.aws.amazon.com/saml and save your application when finished.
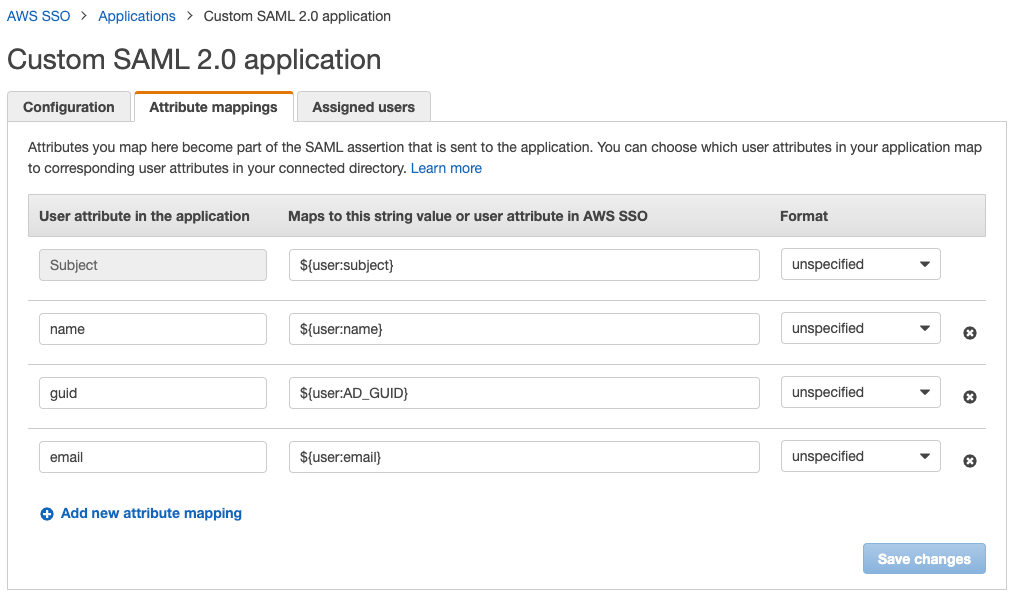
After saving, you'll be taken to the SAML Attribute Mapping tab. Here's where we'll map the values Comet sends to AWS with the storage Schema SSO uses.
Service Provider Attribute Name => AWS Attribute Name
name=>${user:name}email=>${user:email}guid=>${user:AD_GUID}
Please note that if the naming does not exactly match in the application then the integration will not work.
Since a SAML application isn't very useful without a collection of users allowed to log in, tab over to User Groups and make sure to associate a group of users to the SAML application to allow them to log in.
The “Assigned Users” Section is where you can select which users / groups will have access to the applcation.
Note that AWS permissions are binary. A user either has access or does not. AWS will not honor any more granular permissions.
Post-Setup
Once the IdP has been configured you can complete the comet configuration by setting the aws_saml_idp_sso_url and saml_idp_cert_file variables. Set the IdP SSO URL to the value found in the following field:
You will also need to extract the saml_idp_cert_file from the AWS SSO SAML metadata file URL you were told to save earlier.
Once complete follow all instructions in the application configuration.


